![]()
Download Article
![]()
Download Article
It is no longer possible to create a new Gmail account without verifying a mobile phone number. If you don’t have access to a phone number that can receive either text messages or phone calls, you can either gain access to a temporary phone number, or use a friend or family member’s phone for the verification process. This wikiHow teaches you how to sign up for a Gmail account without a phone number of your own, as well as what to do if you lose the phone you use for 2-step authentication.
 |
The topic of this article is no longer active, no longer ongoing, or does not exist. (Posted 2020-03-22).
|
-

1
Get a temporary phone number that can receive texts. When you sign up for a new Google account, you’ll need to verify a confirmation code that can only be received via SMS or voice phone call. If you don’t have your own phone number, here are a few ways you can use one temporarily:
- If you already have a separate Google account and live in the United States, you can create a Google Voice phone number for free. See this wikiHow to learn more.
- Depending on your region, you may be able to sign up for a disposable phone number. Legitimate versions of these services are rarely free—but services like Burner, Hushed, and Text Verified are all affordable and legitimate.[1]
- You can use someone else’s phone and phone number during the verification process. The phone should be in the same room as you so you can get the code yourself. If that’s not possible, you can email or chat with a friend online and ask that they are willing to receive your confirmation code and provide it to you for verification.
-
2
Go to the New Account creation page. The steps are different depending on the platform you’re using:
- On an Android: In the Settings app, tap Accounts (or Accounts and Backup > Accounts), select Add Account, tap Google, and then select Create Account.
- If you’re asked to sign in but don’t see a Create Account option, tap the Forgot email? link, and then tap the back button on your Android to return to the sign-in screen. It should now have a Create account link on the lower-left side of the screen.
- In a browser: Click this link to access the sign-up page.
Advertisement
- On an Android: In the Settings app, tap Accounts (or Accounts and Backup > Accounts), select Add Account, tap Google, and then select Create Account.
-
3
Follow the on-screen instructions until you get to the phone number entry screen. Depending on your platform, you may have to enter some additional information, such as your name, before entering your phone number.
-
4
Enter your temporary phone number and select Next. A special code will be sent to the number via SMS text message.
- If the phone doesn’t receive text messages, follow the on-screen instructions to receive a phone call instead.
-
5
Verify the code. The code begins with a «G» and will be in the body of the text message from Google. If you’re using an Android, tap Next. If you’re using your web browser, click Verify. As long as the code is correct, you will be able to move to the next step of the account creation process.
-
6
Remove the phone number from the account. If you’re using a phone number that won’t belong to you long-term, remove it from your account so nobody can gain access to your password. Here’s how:
- On an Android: Follow the on-screen instructions to create your email address and password. Once the password is set, scroll down and tap More options, tap Do not add my phone number, and then tap Done.
- In a browser: Once the phone number is verified, you may be prompted to «Get more from your phone number.» If you see this screen, tap Skip to get to the next screen. If you don’t see this, you should already be at the right place—a form with a «Phone number» blank on top. Delete the phone number from this blank, fill out the form, and then click Next.
-
7
Complete the account setup process. Once you’ve completed the remaining steps, your Google account will be created and ready to use. No phone number is associated with the account.


Advertisement
-
1
Have your code sent to your backup phone. When you set up 2-Step verification, you were given the option to designate a backup phone just in case you lose access to your main phone. As long as you’ve done this, you can follow these steps to regain access to your account using the backup phone:[2]
- Go to the sign-in page and attempt to log in.
- Click Try another way to sign in or tap More options.
- Click or tap Get a verification code.
- Follow the on-screen instructions to log in using the code sent to the backup phone.
-
2
Use the backup codes associated with your account. If you didn’t set up a backup phone, you may have chosen the option to write down an 8-digit backup code instead. The purpose of these codes is to get you back into your account if you lose access to your primary phone. To log in with your backup code:[3]
- Go to the sign-in page and attempt to log in.
- Click Try another way to sign in or tap More options.
- Select Enter one of your 8-digit backup codes.
- Enter your backup code to log back in.
-
3
Use Google’s account recovery tool. If you didn’t set up any backup options, you may be able to log back in using other information, such as your backup email address.
- Go to https://accounts.google.com/signin/recovery.
- Enter your Gmail address and click or tap Next.
- Follow the on-screen instructions.
-
4
Have your phone number forwarded to another number that works. If you can’t log in to your Gmail account because your phone was lost or stolen and the previous steps did not work, you may be able to associate your phone number with a different phone (temporarily or permanently). Call your phone carrier to ask for your options. You may even be able to get a free replacement phone with the same phone number.


Advertisement
Ask a Question
200 characters left
Include your email address to get a message when this question is answered.
Submit
Advertisement
Thanks for submitting a tip for review!
References
About This Article
Article SummaryX
1. Borrow a phone from a friend.
2. Create a new account.
3. Use the friend’s phone number to verify.
4. Remove the phone number from the account once verified.
Did this summary help you?
Thanks to all authors for creating a page that has been read 576,787 times.
Is this article up to date?
![]()
Download Article
![]()
Download Article
It is no longer possible to create a new Gmail account without verifying a mobile phone number. If you don’t have access to a phone number that can receive either text messages or phone calls, you can either gain access to a temporary phone number, or use a friend or family member’s phone for the verification process. This wikiHow teaches you how to sign up for a Gmail account without a phone number of your own, as well as what to do if you lose the phone you use for 2-step authentication.
|
|
The topic of this article is no longer active, no longer ongoing, or does not exist. (Posted 2020-03-22).
|
-
1
Get a temporary phone number that can receive texts. When you sign up for a new Google account, you’ll need to verify a confirmation code that can only be received via SMS or voice phone call. If you don’t have your own phone number, here are a few ways you can use one temporarily:
- If you already have a separate Google account and live in the United States, you can create a Google Voice phone number for free. See this wikiHow to learn more.
- Depending on your region, you may be able to sign up for a disposable phone number. Legitimate versions of these services are rarely free—but services like Burner, Hushed, and Text Verified are all affordable and legitimate.[1]
- You can use someone else’s phone and phone number during the verification process. The phone should be in the same room as you so you can get the code yourself. If that’s not possible, you can email or chat with a friend online and ask that they are willing to receive your confirmation code and provide it to you for verification.
-
2
Go to the New Account creation page. The steps are different depending on the platform you’re using:
- On an Android: In the Settings app, tap Accounts (or Accounts and Backup > Accounts), select Add Account, tap Google, and then select Create Account.
- If you’re asked to sign in but don’t see a Create Account option, tap the Forgot email? link, and then tap the back button on your Android to return to the sign-in screen. It should now have a Create account link on the lower-left side of the screen.
- In a browser: Click this link to access the sign-up page.
Advertisement
- On an Android: In the Settings app, tap Accounts (or Accounts and Backup > Accounts), select Add Account, tap Google, and then select Create Account.
-
3
Follow the on-screen instructions until you get to the phone number entry screen. Depending on your platform, you may have to enter some additional information, such as your name, before entering your phone number.
-
4
Enter your temporary phone number and select Next. A special code will be sent to the number via SMS text message.
- If the phone doesn’t receive text messages, follow the on-screen instructions to receive a phone call instead.
-
5
Verify the code. The code begins with a «G» and will be in the body of the text message from Google. If you’re using an Android, tap Next. If you’re using your web browser, click Verify. As long as the code is correct, you will be able to move to the next step of the account creation process.
-
6
Remove the phone number from the account. If you’re using a phone number that won’t belong to you long-term, remove it from your account so nobody can gain access to your password. Here’s how:
- On an Android: Follow the on-screen instructions to create your email address and password. Once the password is set, scroll down and tap More options, tap Do not add my phone number, and then tap Done.
- In a browser: Once the phone number is verified, you may be prompted to «Get more from your phone number.» If you see this screen, tap Skip to get to the next screen. If you don’t see this, you should already be at the right place—a form with a «Phone number» blank on top. Delete the phone number from this blank, fill out the form, and then click Next.
-
7
Complete the account setup process. Once you’ve completed the remaining steps, your Google account will be created and ready to use. No phone number is associated with the account.
Advertisement
-
1
Have your code sent to your backup phone. When you set up 2-Step verification, you were given the option to designate a backup phone just in case you lose access to your main phone. As long as you’ve done this, you can follow these steps to regain access to your account using the backup phone:[2]
- Go to the sign-in page and attempt to log in.
- Click Try another way to sign in or tap More options.
- Click or tap Get a verification code.
- Follow the on-screen instructions to log in using the code sent to the backup phone.
-
2
Use the backup codes associated with your account. If you didn’t set up a backup phone, you may have chosen the option to write down an 8-digit backup code instead. The purpose of these codes is to get you back into your account if you lose access to your primary phone. To log in with your backup code:[3]
- Go to the sign-in page and attempt to log in.
- Click Try another way to sign in or tap More options.
- Select Enter one of your 8-digit backup codes.
- Enter your backup code to log back in.
-
3
Use Google’s account recovery tool. If you didn’t set up any backup options, you may be able to log back in using other information, such as your backup email address.
- Go to https://accounts.google.com/signin/recovery.
- Enter your Gmail address and click or tap Next.
- Follow the on-screen instructions.
-
4
Have your phone number forwarded to another number that works. If you can’t log in to your Gmail account because your phone was lost or stolen and the previous steps did not work, you may be able to associate your phone number with a different phone (temporarily or permanently). Call your phone carrier to ask for your options. You may even be able to get a free replacement phone with the same phone number.
Advertisement
Ask a Question
200 characters left
Include your email address to get a message when this question is answered.
Submit
Advertisement
Thanks for submitting a tip for review!
References
About This Article
Article SummaryX
1. Borrow a phone from a friend.
2. Create a new account.
3. Use the friend’s phone number to verify.
4. Remove the phone number from the account once verified.
Did this summary help you?
Thanks to all authors for creating a page that has been read 576,787 times.
Is this article up to date?
Благодаря привязке к мобильному телефону вы всегда сможете восстановить доступ к аккаунту. Если мошенники узнают ваш пароль, вы сможете просто изменить его, запросив код подтверждения на номер своего мобильного телефона, и сохранить учётную запись в безопасности.
Привязка игрового аккаунта к мобильному телефону — бесплатная операция.
При привязке учётной записи к мобильному телефону ваш номер будет использоваться только для отправки вам SMS с кодами. Никаких рассылок на указанный номер отправляться не будет.
Как привязать телефон
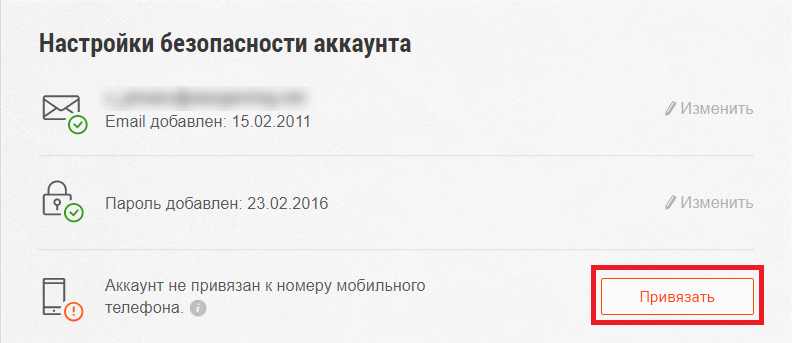
- Авторизуйтесь и перейдите в Личный кабинет. На странице Личного кабинета, в настройках безопасности аккаунта, нажмите кнопку «Привязать».
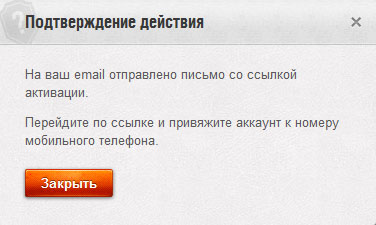
- На электронную почту, которую вы используете для входа в игру, будет отправлено письмо со ссылкой активации.
- Проверьте свой почтовый ящик и перейдите по ссылке, чтобы активировать привязку.
Что делать, если нет доступа к почте?
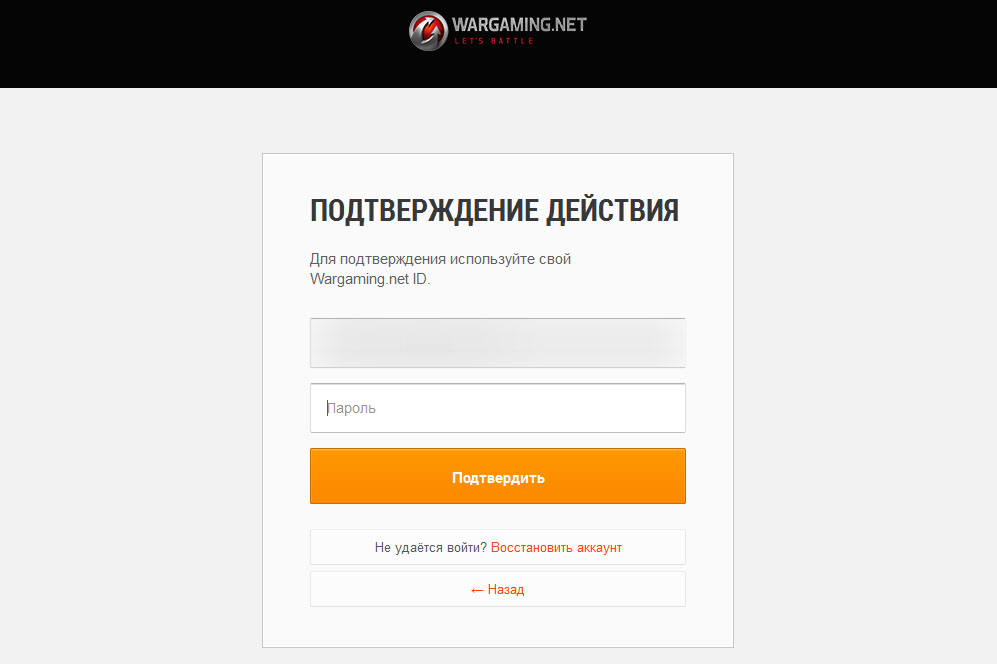
Что делать, если письмо не приходит? - Введите адрес электронной почты и пароль, которые вы используете для входа в игру, чтобы подтвердить привязку.
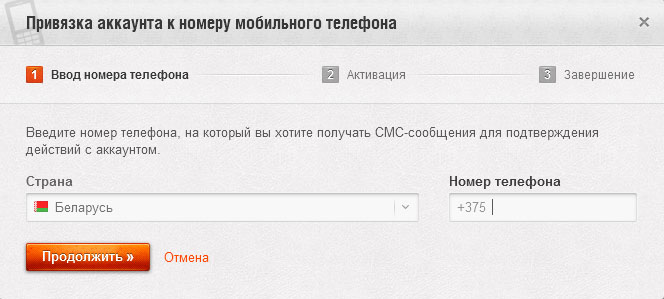
- Укажите свою страну проживания и номер мобильного телефона, а затем нажмите Продолжить.
- Проверьте правильность введённых данных и нажмите на кнопку Получить СМС-код.
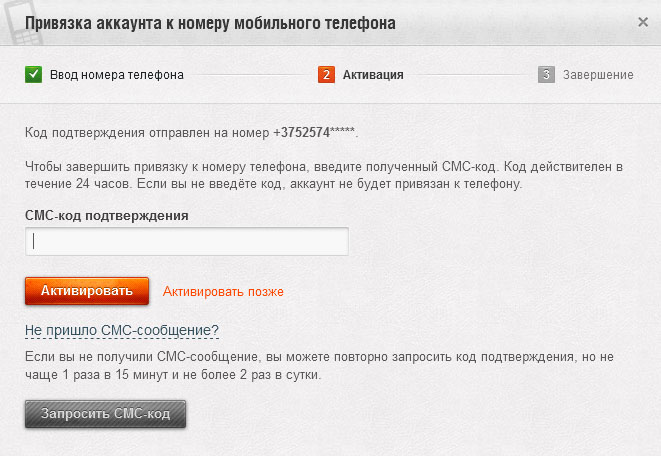
- На указанный вами номер телефона придёт SMS с кодом подтверждения. Введите полученный код в специальное поле и нажмите Активировать.
Что делать, если код не пришёл?Вы можете запросить код ещё раз, но только два раза в сутки и не ранее, чем через 15 минут после предыдущего запроса.
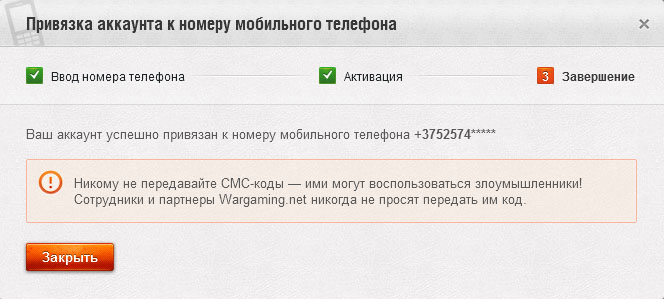
- Если привязка прошла успешно, вы увидите соответствующее сообщение. После этого нажмите Закрыть.
- Информация о привязке телефона также будет обновлена в Личном кабинете.

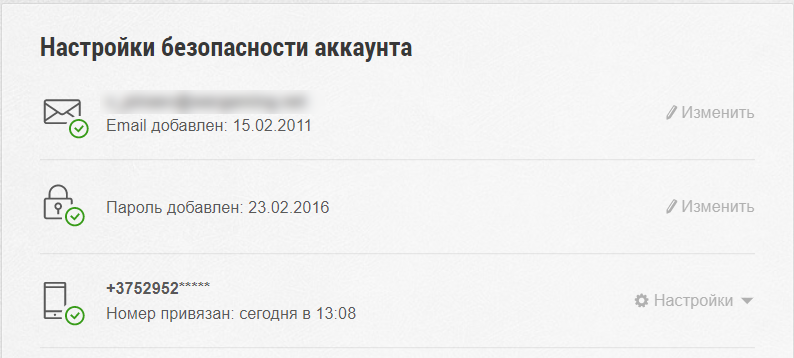
Как изменить телефон
Если вы привязали учётную запись к номеру телефона, то всегда можете его изменить. Однако если вы не привязывали учётную запись к своему номеру телефона и доступ к ней получил злоумышленник, то он может совершить привязку раньше вас. Что делать, если аккаунт взломали и нет доступа к учётной записи?
Мы настоятельно рекомендуем привязывать аккаунт к номеру телефона, чтобы в случае потери контроля над учётной записью вы смогли самостоятельно восстановить доступ к ней.
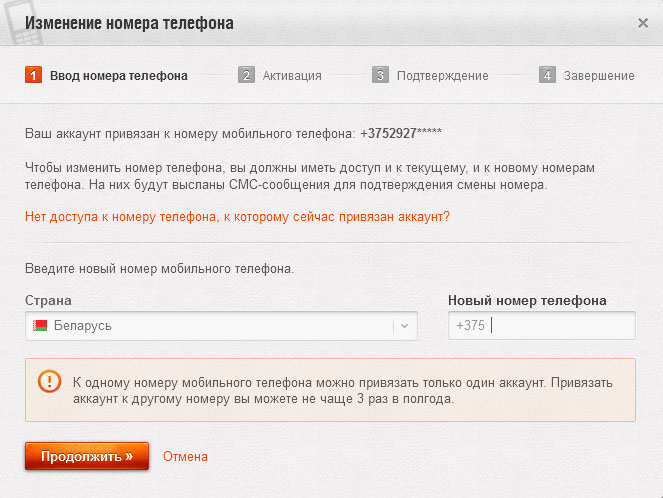
Изменить номер телефона можно не раньше, чем через месяц после привязки, и не чаще, чем трижды за полгода. Если у вас нет доступа к своему номеру мобильного телефона, отправьте запрос оператору мобильной связи для восстановления номера.
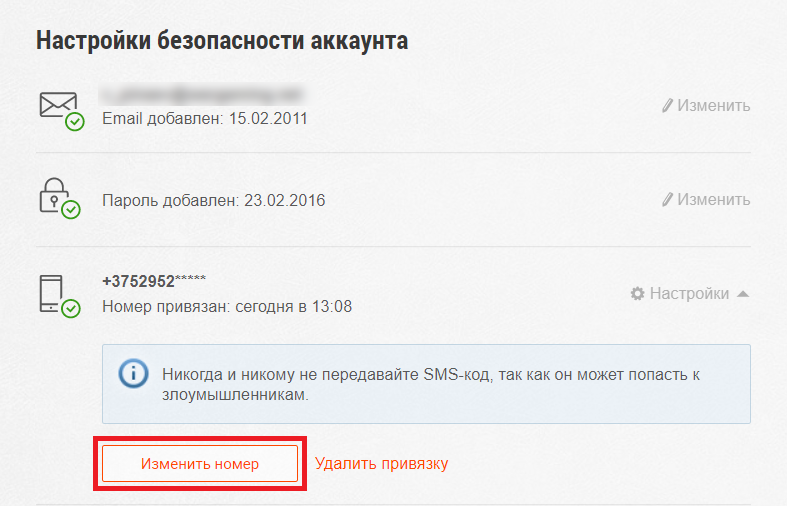
- Авторизуйтесь и перейдите в Личный кабинет. На странице Личного кабинета, в настройках безопасности аккаунта, нажмите на слово «Настройки» справа от текущего телефонного номера. Затем нажмите кнопку «Изменить».
- Выберите свою страну, введите новый номер телефона и нажмите Продолжить.
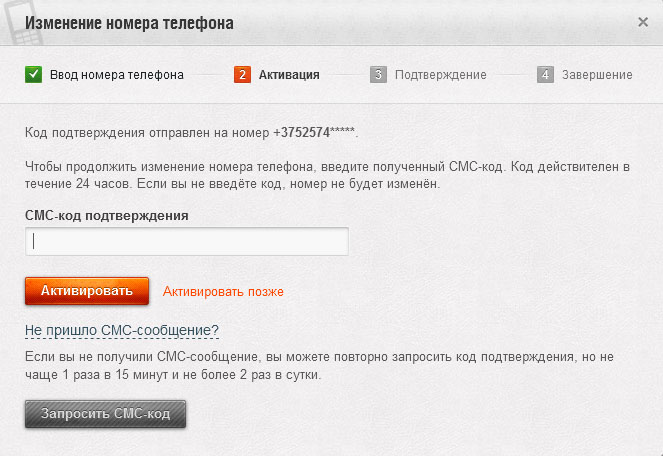
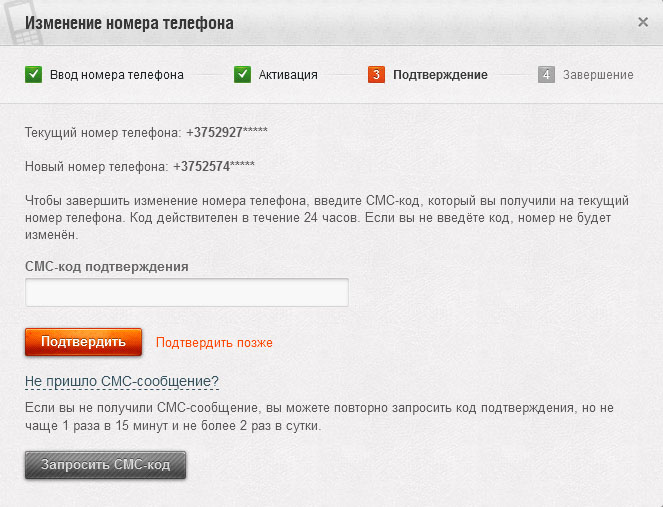
- Проверьте правильность введённых данных и нажмите на кнопку Получить СМС-код.
- На новый номер придёт SMS с кодом активации. Введите полученный код в соответствующее поле и нажмите Активировать.
Что делать, если код не пришёл? - На номер, к которому привязан аккаунт в данный момент, придёт код подтверждения. Введите полученный код в соответствующее поле и нажмите Подтвердить.
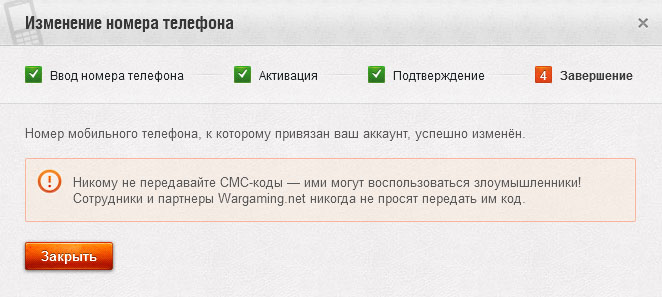
Что делать, если код не приходит? - Отобразится сообщение о том, что номер успешно изменён. Завершите изменение номера, нажав ОK.
- Информация также будет обновлена в Личном кабинете.

Как отвязать телефон (доступ к номеру есть)
Если вы привязали аккаунт к номеру телефона, то всегда можете удалить привязку.
Однако, если вы не привязывали учётную запись к своему номеру телефона и доступ к ней получил злоумышленник, то он может совершить привязку раньше вас.
Что делать, если аккаунт взломали и нет доступа к учётной записи?
Мы настоятельно рекомендуем привязывать аккаунт к номеру телефона, чтобы в случае потери контроля над учётной записью вы смогли самостоятельно восстановить доступ к ней.
- Авторизуйтесь на официальном портале любой из наших игр или на сайте Wargaming.net и перейдите в Личный кабинет.
- На странице Личного кабинета, в настройках безопасности аккаунта, нажмите слово «Настройки» справа от текущего телефонного номера, а затем на ссылку «Удалить привязку».
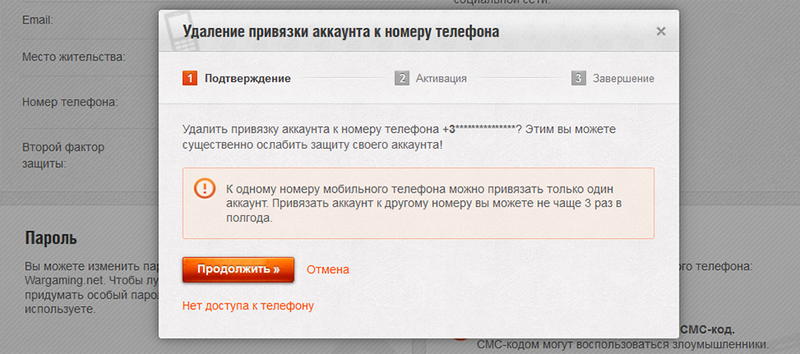
- Чтобы подтвердить своё желание удалить привязку, нажмите Продолжить.
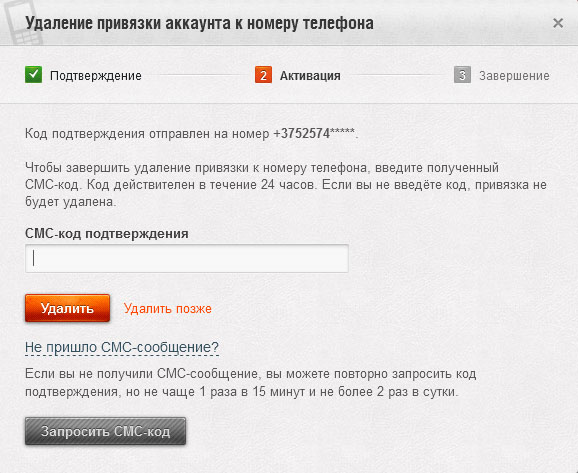
- На номер, к которому привязан аккаунт, придёт SMS с кодом активации. Введите полученный код в соответствующее поле и нажмите Удалить.
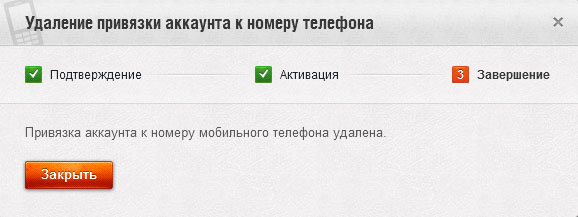
Что делать, если код не пришёл? - Отобразится сообщение о том, что удаление привязки прошло успешно. Завершите удаление привязки, нажав ОK.
- Если вы удалили привязку, то совершить её заново можно не раньше, чем через месяц после предыдущей привязки и не чаще трёх раз в полгода. Если у вас нет доступа к своему номеру телефона, отправьте запрос оператору мобильной связи для восстановления номера.

Как отвязать телефон (доступа к номеру нет)
Если вы привязали аккаунт к номеру телефона, то всегда можете удалить привязку. Но если аккаунт не привязан к телефону и доступ к нему получил злоумышленник, то он может совершить привязку раньше вас. Что делать, если аккаунт взломали и нет доступа к учётной записи?
- Войдите в Личный кабинет с помощью электронной почты и пароля. В настройках безопасности аккаунта, нажмите слово «Настройки» справа от текущего телефонного номера, а затем на ссылку «Удалить привязку».
- Чтобы подтвердить удаление, нажмите на ссылку «Нет доступа к телефону».
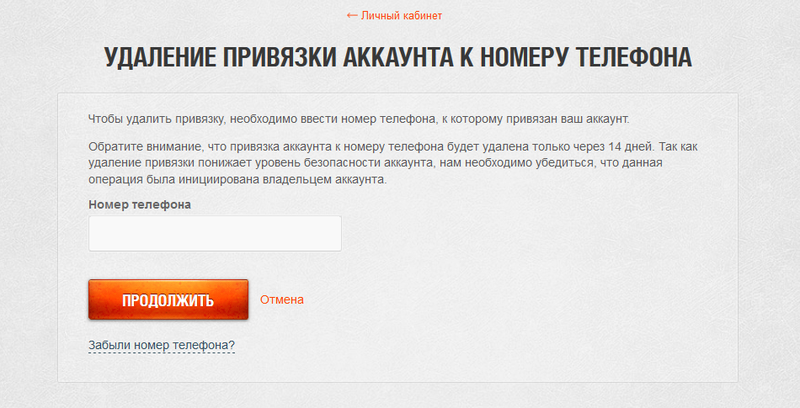
- Введите номер телефона, к которому привязан аккаунт, и нажмите Продолжить.
- Чтобы подтвердить удаление привязки, перейдите по ссылке из письма, которое придёт на вашу почту. Ссылка действительна 24 часа.
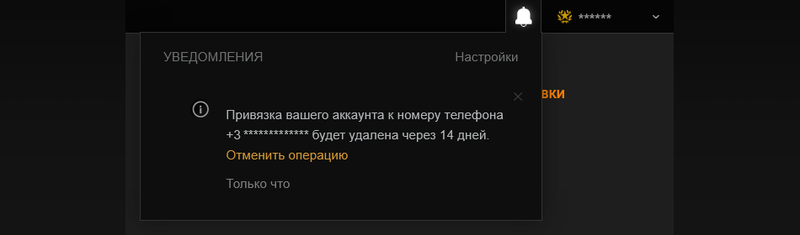
- В Личном кабинете отобразится сообщение, что ваш запрос принят. В нём вы также найдёте дату, когда привязка будет удалена, и ссылку для отмены удаления.
- Вам также придёт уведомление на сайте и в клиенте игры. Такие уведомления будут приходить вам раз в неделю, пока привязка не будет удалена.